How to Make a DIY Micro-Gaff
Listed is what anglers need, what they need to do and some tips on how one can make their own micro-gaff.
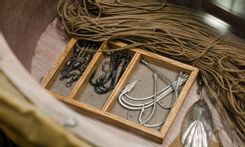

A gaff is a simple tool that is vital to anglers as it is used mostly on board fishing vessels for gaffing and hooking fish. The tool comes in a wide variety of sizes, differing in lengths, girth, and hook size. Most gaffs that are sold in the market are made to haul large fish. Smaller gaffs are also used to bring in smaller and active fish and are also used for lip gaffing catches an angler plans to release. Micro-gaffs may be much harder to look and shop for but it’s possible to have a rodmaker make one for you, or you can make one yourself.
The Main Things You Need for a Micro-Gaff
1.A Hook
The hook is the most important part of the gaff. Stainless hooks can be purchased in a vast variety of sizes and makes.
2. A Shaft
A section of a rod blank or the end of the broken rod are good materials to use as a shaft. An old golf club made out of steel or graphite can also be used. Anglers would want something that is about 20 inches long if they’re fishing in a small vessel. This part is very customizable and you can make it as short or as long as you want and need it to.

3. A Handle
Materials such as EVA foam or a cork grip can be used as a handle which will be attached to the shaft.
What To Do and Tips
1. Prepare the Hook
To prepare the hook, heat the eye and straighten it with pliers. Bend the last bit to a 90-degree angle opposite the hook bend. You can also use the hook with its eye still intact for a faster option.
2. Installing the Handle
To install the handle, use epoxy to coat the butt end of the shaft and you can use shaving gel to lube the material you’re going to use as a handle. If you are using foam, you can shave it down to the shape you want using sandpaper. For cork, you should ream the ID tightly to the shaft and fasten it with wood glue. You can shape both materials on a lathe.
3. Modifying the Shaft
Anglers who have opted to use an old golf club won’t have to worry about putting on a handle as they already come with one. A club made out of graphite is easier to work with. To cut the material, wrap it around with masking tape on the spot where you intend to cut it, and then use a hacksaw or any fine-toothed saw. Do not put too much force when cutting as it may splinter the shaft. After making the cut, sand it smooth. Working with steel and harder metals is much harder so using a grinder to cut it to the length you prefer and smooth it down is the thing to do.
4. Attaching the Hook
There are several ways to attach a hook to the shaft. One preferred way is to heat the eye, straighten it with needle nose pliers, and hammer it out to remove any wrinkles. Drill a hole on the bottom end of the shaft and heat the straightened tip of the hook and bend a small part 90 degrees opposite the direction of the main hook. Insert the bended tip in the hole in the shaft and wrap it with either rod wrapping thread or nylon that has been epoxied to secure it.
A faster way is to keep the eye of the hook as it is and just screw through the eye into the shaft. It still needs to be wrapped using thread or twine and be applied with epoxy. If you have a hollow shaft and the eye of the hook can fit inside, it can be pinned using a copper or silver nickel pin. For this, you should put a foam to stop where the pin goes through. When you have put the pin through the eye, fill it with epoxy. You can grind down the edges of the eye if it’s too large to fit.

Optional Additions and To Do’s
1.Adding a Lanyard

Adding a lanyard to your handle will provide you with an extra grip when you gaff or hook fish. You can either drill a hole through the handle and run a paracord or any type of utility cord through it, or glue the ends of whatever material you are using as a lanyard into the shaft and cover and secure with epoxy. Tie the ends of the cord you are using with a knot if you are running it through the handle. If you are planning to do the second method, use a piece of closed cell foam and force it down the shaft before filling it with epoxy to secure the lanyard.
2. Inscribe Your Name and Design Your Micro-Gaff
This isn’t necessary but it just makes your micro-gaff nicer and more personalized. A wrap of thread tipped with any metallic thread trim can be used to accomplish this. Anglers can also ask their rodmaker to do it for them. Since you made the gaff yourself, you can add on as many other features as you want that would help you with any type of fishing you want and need to do.
3. Ensure Safety
When the pointy end of your micro-gaff is not in use, you can use a bit of surgical or vinyl tubing to cover the hook.
4. Get a License for Your Micro-Gaff
This may not always be necessary but it’s always a good idea to register fishing gear so you are always abiding by local fishing law requirements. Measure your tool and mark it.
Anglers will come across using different types of tools and equipment the more they fish. So it’s always an advantage if you can make a tool for yourself, like the micro-gaff, that would cater to what you want and need out of its use. Sometimes things that you’re able to make for yourself will last longer than those bought from a store because you know how it was made, what it’s made of and how to improve it. It’s amazing what scrap materials can do to provide you a significant addition to your fishing gear.