 July 19, 2022
Calendar

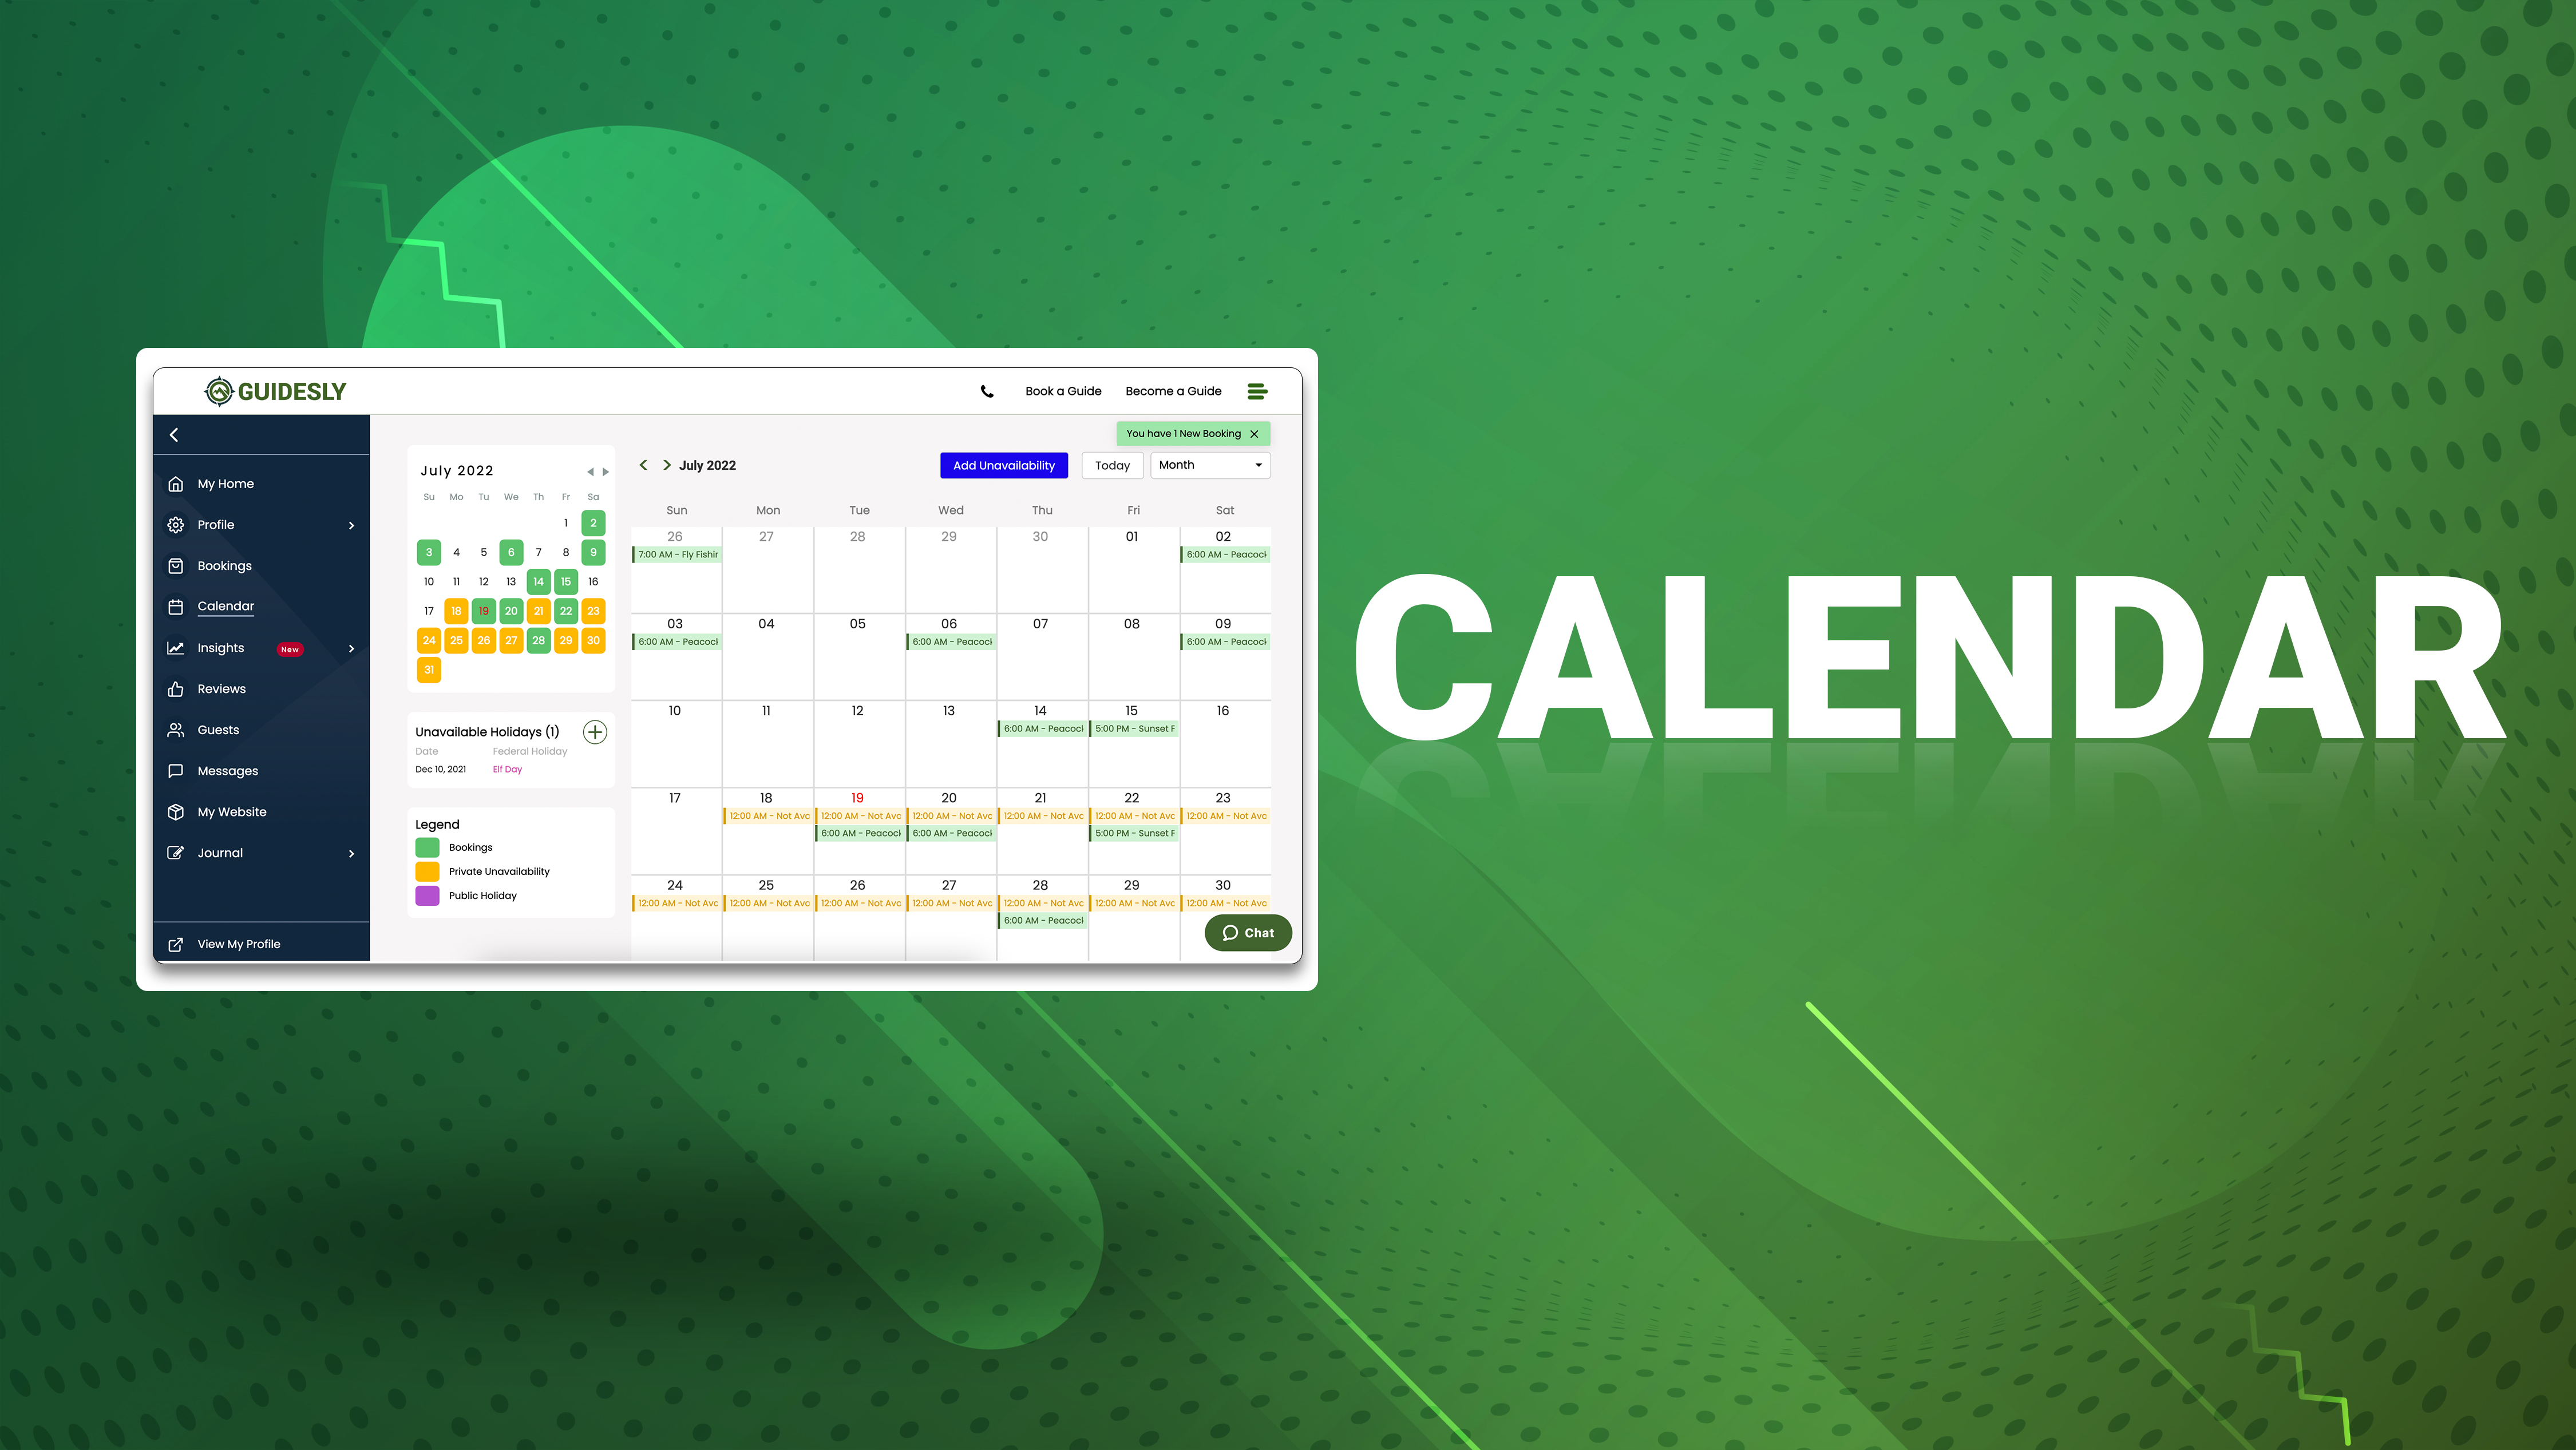
Learning how to use your calendar will help you manage your availability and view your schedule. Feel free to treat this feature like your own personal calendar- from vacations to appointments, trip dates will be automatically blocked off. Worried about double booking? With our easy double booking solution, never miss a new trip no matter what booking platform it originated from. Our central calendar is your one-stop shop to being a successful guide. The calendar will also help your guests by providing them with accurate availability when they book your rate cards.
*Note: Calendar details are private and for your eyes only- your guests can only see your general availability.
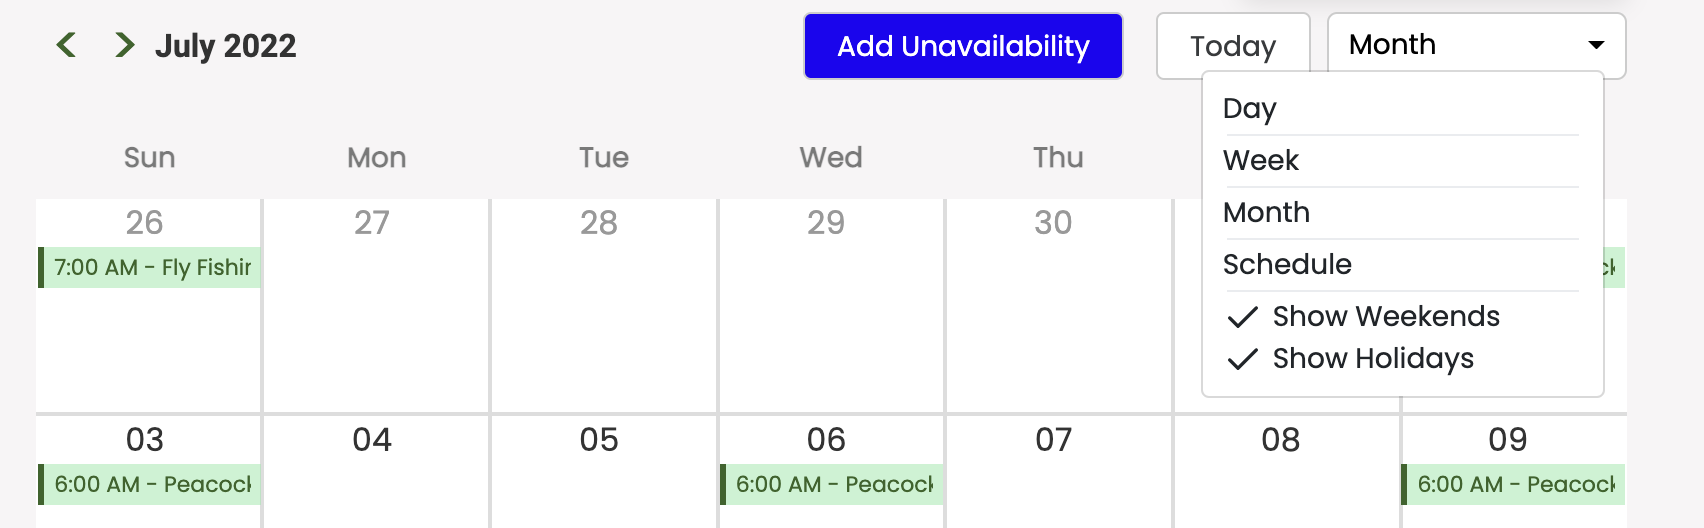
At first glance the calendar is organized by month view, but feel free to select the dropdown button currently labeled ‘Month’ in the top right corner to select a day or week view instead! You can also choose whether or not you would like to see weekends and holidays.
The Basics
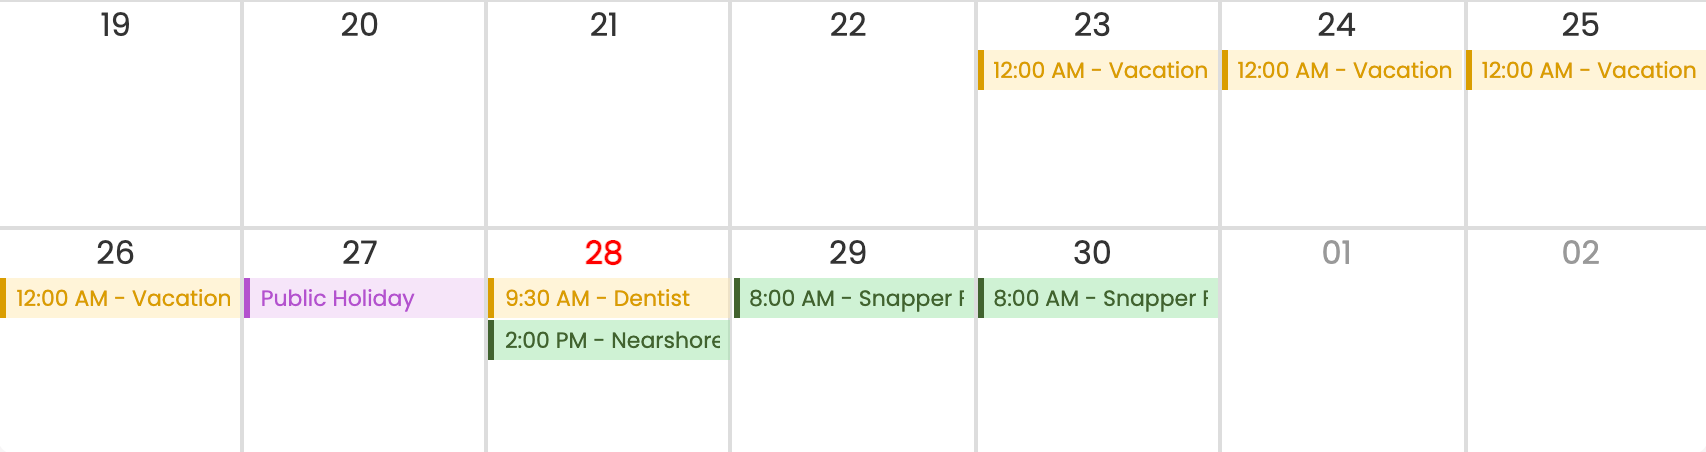
On your calendar, each date is blank besides the current day which is highlighted in red. If you have any unavailability, it will be highlighted yellow on the day and time with your description provided. Booking details for trips will block off your calendar for the rate card’s duration in green.
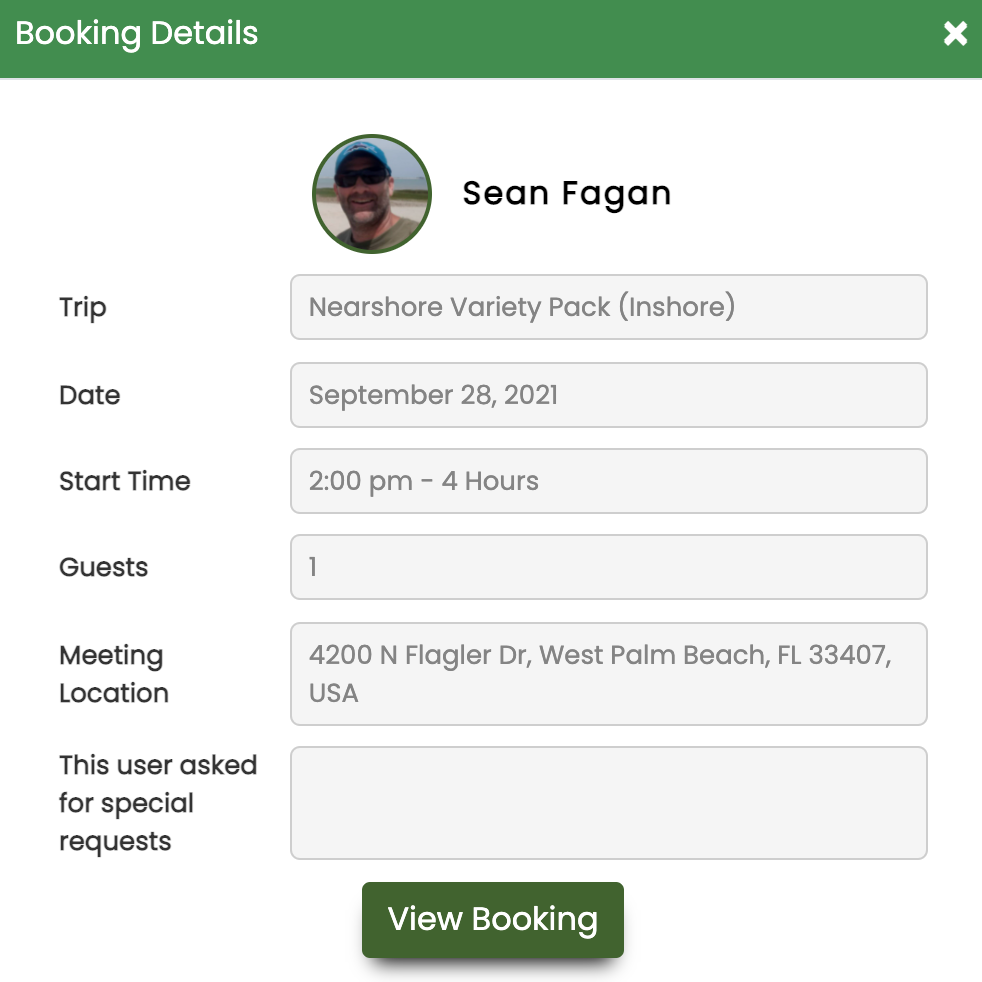
If you click on the booking, you will be able to see important information such as:
- The guest's name
- Type of trip
- Date
- Start time
- Total trip duration
- Number of guests attending
- Meeting location
- Special requests
You also have the option to click the green ‘View Booking’ button to see an even more detailed description of the booking including the trip confirmation details and payment information.
Adding Unavailability
Know you’re going on a family trip? What about a reoccurring work meeting that prevents you from hosting fishing trips? In this section, we’ll explain how to add different types of unavailability to your calendar.
By default, guides are automatically labeled as available except on federal holidays. That means that guests can book your trips on any day by your rate card time frames. To add unavailability, follow these simple steps.
Mobile:
- Click the blue ‘+’ in the bottom right corner.
- Choose ‘Add Unavailability’
- Add a title if you would like. Otherwise, the default title will be ‘Not Available.’
- Add a description to your unavailability if you would like. This is just for your eyes only.
Web:
- Click the blue 'Add Unavailability’ button near the top of the screen
- Add a title if you would like. Otherwise, the default title will be ‘Not Available.’
- Add a description to your unavailability if you would like. This is just for your eyes only!
Adding Different Types of Unavailability

Entire Day
If the unavailability is for the entire day, click all day. Click the calendar icon under ‘date’ to choose the day you are unavailable. Skip the times and press ‘block.’

Partial Day
If the unavailability is for a partial day, click either ‘AM’ or ‘PM.’ Then, you will be blocked off for the time frames of either 5:00 AM-11:00 AM for AM unavailability or 1:00 PM-7:00 PM for PM unavailability.
If you need to adjust those times to make them shorter or longer, click on the small arrows under ‘Start Time’ and ‘End Time’
Press the blue ‘Block’ button at the bottom.
Range

For consecutive unavailability, toggle the ‘Select a Range’ switch to the on setting.
Then, click the calendar icons below to choose your first day of unavailability to your last.
If you would like to add a time in this range, choose ‘AM’ or ‘PM’ and update the start and end times if necessary.
Your entire calendar will be blocked off for the duration of these dates and/or times.

Unavailability with Different Dates
Mobile: Click the blue ‘+’ in the bottom right corner.
Web: Click on the blue ‘Add Unavailability’ button in the top right of the screen.
Click the green calendar icon in the middle of the popup.
Toggle ‘Select Multiple Days’ to ‘On.’
Click on the first date and a new calendar will pop up. Highlight all the dates that you want to be unavailable and click ‘Save.’ If you accidentally click a date, just hit the orange (x) next to the date and it will be unselected.
Note: These unavailabilities can be for all day or for a partial day. To see how to create partial day unavailability, scroll up to the ‘Partial Day’ section of this page.
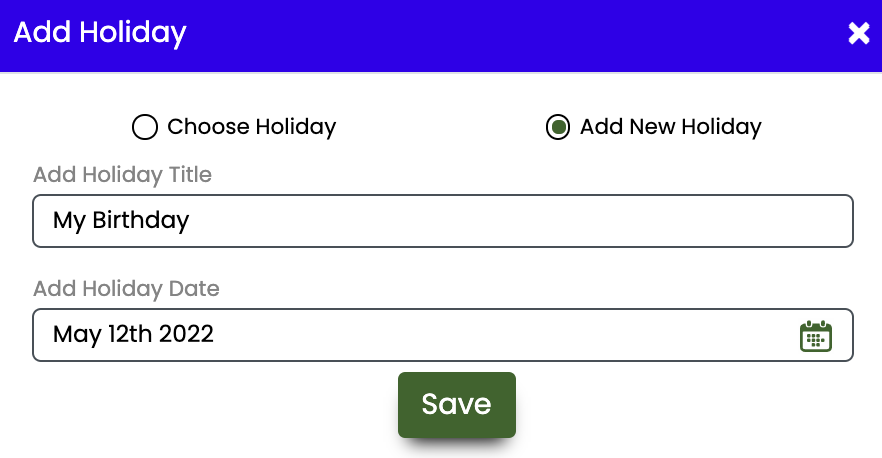
Adding Unavailable Holidays
Mobile: Click the blue ‘+’ in the bottom right corner.
Web: Click the white ‘+’ under the calendar in the bottom left.
Choose ‘Add a Holiday’
Check off multiple holidays for full day unavailability or add your own new holidays in.

Adding Recurring Calendar Events
Mobile: Click the blue ‘+’ in the bottom right corner.
Web: Click the white ‘+’ in the ‘Unavailable Holidays’ section in the bottom left.
After adding your date and time block, check off ‘Make this recurring.’ Choose your pattern- daily, weekly, monthly, or yearly and when the event will stop recurring.
To delete recurring events, click on one event from your calendar. At the bottom of the event details, there will be the option to delete the singular event or all events in the series.
Double Booking
The best part of your Guidesly calendar is that it is a central hub for all your bookings, even bookings made on different platforms. To do this, we link your Guidesly calendar with calendars you have on your personal website and on other fishing booking websites. When a booking is made on a website that isn’t ours, your Guidesly calendar will auto-update to include this booking. This way, guides can have a simple way to view all of their bookings in just one central place.
-Calendar Updates-
October 2021
- Added Multi-Day Unavailability that isn’t a range- Pick and choose dates you are unavailable all at once.
- Easily view booking details by clicking on the bookings in the calendar- No need to scroll through different sections of Guidesly to find important guest booking information. Just simply click on your calendar and see all the details right there.
- Updated easy-to-use interface- Clearer colors and an easier-to-read calendar make manageability a breeze!
- Unavailability description field- For your own purposes, keep track of why you are unavailable. Add any information you’d like!
February 2022
- Bulk-add and delete calendar events- a top-rated solution for busy guides!
July 2022
- Cancelled trips are hidden from your calendar, ensuring accuracy.
