Homemade Surf Rod: Why Buy When You Can Build Your Own
Here's what you will need and some tips on how to build your own surf rod.
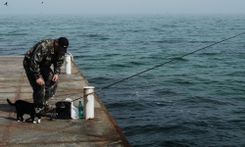

Normally very long compared to other types (so you can cast longer distances over the waves), surf rods are designed for fishing in saltwater or brackish waters by anglers who set up along the coastal beaches or on the shores of bays. Building your own multi-purpose surf rod will not only make you handy and crafty as an angler, but it can also save you money, provide a rewarding experience and add to your knowledge of survival skills. Making a surf rod on your own will also ensure that you know you have made it with materials and components that you know can withstand the, at times, strong tides when you are surf casting. Additionally, you can make a rod that will perfectly suit your needs in any situation you would be in when you are out hooking fish.
If you are starting out building your own rod, you’ll need some special equipment. You can make a surf rod using a homemade wrapping jig. Otherwise, you can buy entry-level starter kits that are easy to use. In addition to a basic wrapping jig and rod dryer, here are the materials you will need.
The Basic Things You Will Need for a Surf Rod
- A Blank - In the rod building process, the selection of a bank is the most important part as it impacts how it will perform once it is finished. The most significant factors to consider when choosing a bank is its length and action. Other notable concerns are lure weight, line rating, and what material it is made out of. If you want fast action and a quick recovery time, a blank made of graphite is the best choice. On the other hand, a blank made out of fiberglass will give you a slower yet consistent bend that will absorb shocks and protect lines. A compounded blank made out of both materials will give you a compromised function, with the ratio of the materials affecting the action.
- A Reel Seat - A spinning reel seat is a common option. You can either go for a graphite one that is secure or something made out of aluminum if you want it to be more lightweight. Make sure it will fit the blank you chose.
- Guides - You can find different types of guides with some designed to cut down weight, others refined to optimize a specific fishing technique, and some are just built to be really sturdy. A popular and effective material for a guide is the titanium Torzite which has been developed to be slicker, smoother, and tougher than the standard silicon carbide rings.
- A Handle - On a surf stick, cork tape is the most traditional material to use. In recent times, golf or tennis grips as well as heat shrink tubing are also a popular option because they’re easy to use and are durable. If you want a handle that’s especially suited for fishing on the surf, carbon fiber grips are a terrific choice. Those grips have a distinctive semi-smooth finish that even when wet, can offer you plenty of purchase.
- Thread - Here is where you can get creative and give your surf rod its own distinct personality as you can use custom wraps or dye the thread in a color of your choosing. A variegated thread is a good and common option.

Building a Homemade Surf Rod
- Temporarily attach the guides and reel seat to the blank using insulation tape and test it out at the beach so you get a feel for it and then make necessary adjustments.
- Rods are always built from the butt to the tip, so start with attaching the handle or grip. Use epoxy to fill in gaps when they’re not snug enough. Roll the rod on a flat surface to check the alignment.
- Glue the reel seat using 24-hour epoxy. Make sure the fit is snug and is centered on the blank.
- Wrap the blank and handle above and below the reel seat with black rubberized surf grip tape or other kinds of rubber tape to protect and complete the handle area. A great tip is to wrap at an angle, overlapping by a few millimeters to ensure a smooth, neat and uniform thickness and adhesion.
- Wrap the tape almost to the end and use another carbon fiber grip or an EVA cap to finish it off. You can also bind the end with thread and coat it with epoxy. If you want a quicker method, use insulation tape at the end to stop the grip from coming undone.
- Using thread, set and attach the line guides in place. Cover the thread with a couple of coats of epoxy so it can avoid damage and increase durability.
- Let everything set and dry so you can finally test it out when you go fishing on the coast or shore.
After you finish building your surf rod and have probably created a few different ones, you might want to try your hand at building your own surf spike next. Surf spikes are used to hold down one or multiple rods when you are using live bait until a fish takes.

How to Make a DIY Surf Spike
Making your own surf spike is easy and inexpensive, as all you need is a PVC pipe that is at least three feet long that can hold your surf rod’s diameter and a stainless steel bolt. Cut the PVC pipe at an acute angle with a saw so the sharp end result can make it easy for you to stick the pipe in the sand. On the opposite end, from about one foot, drill a hole through the center so you can fit it with the stainless steel bolt. It will act as a stopper for your rod’s butt when you insert it into the pipe. You can use a file or sandpaper to buff out the ends of the pipe so it doesn’t scratch your rod and won’t scratch you when you’re handling it.