Tips for Tying Tiny Flies
Tiny flies are great for tying fish patterns, especially when fishing trout or salmon.

Tiny flies are great for tying fish patterns, especially when fishing trout or salmon. They are also helpful for fly fishing, especially for catching large fish such as steelhead or brown trout.
Fly fishing flies are typically made from artificial hair, fur, and feathers and attached to a hook. These materials help trick sport fish such as trout into thinking they are natural insects, baitfish, or other aquatic life. The size of tiny fish flies varies depending on their intended use and is denoted by a number corresponding to the hook's length to which they are tied.
If you are new to fly fishing, you should always start with simple patterns before moving to more complicated ones. In this way, you will get better at tying them and eventually master the art of tying tiny flies.

Things to Consider When Tying Tiny Flies
Basic Tools
Before making any kind of fly, you need to have some basic tools in hand. Here are the essential tools that every fly tyer needs:
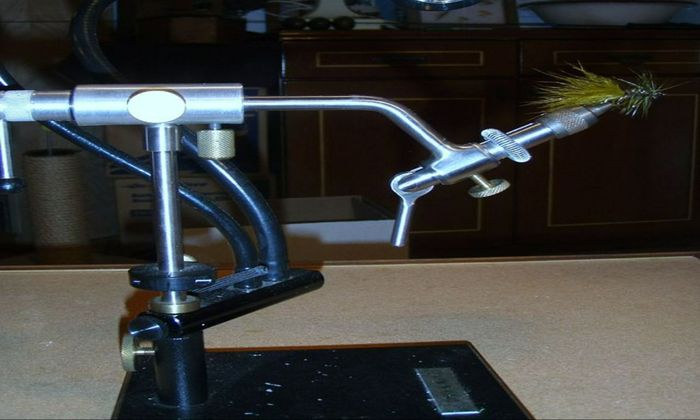
1. Fly Tying Vise

A vise will make tying easier since you don't have to hold the material while trying to shape it. It helps keep the material straight and allows you to move it around without getting tangled up.
2. Thread
Threads are crucial because they hold your tying materials to the hook. You can use any kind of thread appropriate for the type of fly you are making. Some people prefer using nylon monofilament because it has more stretch, is strong, and transparent; others like polyester because it's easy to knot and has a higher denier for a length of the same diameter, making it a bit stronger.
3. Hooks
The essential part about tying flies is making sure you have the right hook for your materials. You'll want to get a pretty long hook shank so that it curves easily over rocks and logs to prevent snagging. A general rule of thumb is to use a hook shank two times the length of the hook gap plus the hook eye.
4. Fly Tying Scissors
A good pair of sharp scissors is necessary for cutting all types of materials. It's best to buy a pair specifically designed for fly tying.
5. Hackle Pliers
Hackle pliers help wrap a feather around the hook shank; they allow you to grip the feather’s shaft tightly without damaging it. It comes in four types: Basic Clamp, Tweezer Clamp, Finger Grips, and Nabbers.

6. Bobbin
Bobbins, hold your thread as it unravels from the spool to the hook while maintaining tension. Most bobbins include a thread spool holder and an elongated eyelet through which you feed the thread.
7. Hair Stacker
The hair stacker keeps hair strands organized and neat by bundling them together. It aligns the hair tips to make it equal and even more manageable to work with. Hair stacker also allows the tyer to control the amount of hair cut easily.
8. Bodkin or Dubbing Needles
Bodkin or dubbing needles are versatile tools for picking out dubbing, applying head cement or glue, and maneuvering hair fibers. You can purchase one or make your own by pushing a sewing needle through a pencil eraser until it's wide enough to hold the materials.
9. Whip Finish Tool
A whip finish tool helps you to tie off the fly. Using this tool ensures the line does not get tangled when you're fishing. The tool makes it easy to tie your flies by making a secure knot properly.
10. Dubbing Wax
Dubbing wax is commonly used to control the hairs attached to the hook. It gives your fly a slender look and a shiny appearance.
11. LED Light
Tying flies is one of the most strenuous activities for the eyes. LED lights reduce eye strain by providing a steady light source in dark areas. Additionally, it creates a positive tying experience, allowing for longer tying sessions.
Tying Process
There are three processes involved in tying a tiny fly: selecting the materials, preparing the materials, and finishing the materials. Each method takes time, but they are not too complicated if you follow the instructions carefully.
1. Selecting the Materials
Select the materials that you will be using for the fly. For example, you may choose between different colors of feathers or different sizes of hooks. Feathers come in many different colors, shapes, and textures. The size of the feather depends on what kind of fish you plan to catch. Smaller flies such as nymphs usually require smaller feathers.
2. Preparing the Materials
Once you've selected the materials, prepare them by cleaning them thoroughly. Cleaning the materials will remove dirt and oils that could affect the color and durability of the materials.
3. Tying the Fly
After you've cleaned the materials, begin to tie the fly. The first step is to secure the hook to the material, which can be accomplished by crimping the hook or puncturing the material. Crimp the hook into the material by holding the hook and pulling down the shaft while moving the tip back and forth. Piercing the material involves inserting the hook’s point and then twisting it to create an opening. Once the hook is attached, wrap the thread around it and pull it tight. Then continue to add additional layers of material until you reach the desired thickness.
4. Finishing Step
Finally, finish the fly by adding tails and other embellishments once you're satisfied with the design. Some people prefer to leave their flies unfinished to look more natural when caught in the water. Others like to add beads, buttons, or other decorative elements to make their flies stand out.
Practice Makes Perfect
Tying small flies requires patience and practice. The more you practice tying tiny flies, the better your skill level will improve. When it comes to making tiny flies that are both effective and beautiful, techniques are essential, as they are in all aspects of fishing. So, familiarize yourself with your materials, make a plan for how you want your fly to look, and have fun!


