How to Catch Yellowfin Tuna: Offshore Fishing Guide
Your complete offshore Yellowfin Tuna guide with tips on hotspots, bait, tackle, sonar, and fishing techniques to help you land more tuna this season.

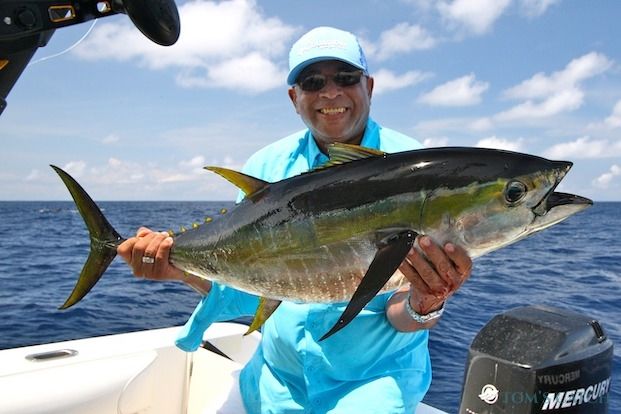
Yellowfin Tuna are one of the most powerful and rewarding offshore gamefish, known for blistering runs, deep dives, and non-stop strength. Anglers chase them across warm blue water because these fish demand skill, preparation, and the ability to read changing offshore conditions. To catch Yellowfin consistently, you need seasonal awareness, an understanding of where tuna move during different water temperatures, and the ability to navigate offshore structures such as ridges, canyons, and current lines. The right bait, tackle, and presentation become crucial when tuna shift between surface feeding and deeper holding zones. Modern offshore fishing also relies heavily on GPS and sonar, helping anglers locate temperature breaks, bait schools, and tuna marks with much greater accuracy and confidence.
Decoding Yellowfin Tuna: Patterns Every Angler Must Know
Yellowfin Tuna are fast, powerful, migratory fish that thrive in warm offshore waters where bait is abundant. They follow temperature breaks, currents, and offshore structures such as ridges, canyons, and seamounts that naturally gather sardines, mackerel, squid, and flying fish. Their movement is influenced by water temperature, daylight, and current strength, which determines when they rise to the surface or hold deeper in the water column. This behavior shifts throughout the day, making timing and location essential for consistent success.
Yellowfin have sharp eyesight and quick reaction speed, so bait presentation must match conditions. In clear blue water, anglers rely on natural colors and lighter leaders, while greener water allows for stronger silhouettes and scented baits. Their feeding intensity changes with seasonal shifts, pressure systems, and bait availability, which is why anglers must study patterns and stay flexible. Understanding these tendencies creates a stronger foundation for offshore planning and technique selection.

Seasonal Hotspots for Yellowfin Tuna
Yellowfin Tuna follow warm water, shifting currents, and moving bait schools throughout the year, creating predictable seasonal patterns across major offshore regions. Knowing when these areas peak helps anglers plan productive trips and stay ahead of changing conditions that affect feeding activity. These patterns vary across both U.S. waters and top international destinations, each offering unique seasonal windows for strong Yellowfin action. Here are the key hotspots and their best months.
United States
Gulf of Mexico: Strong Yellowfin action peaks from April to September, when warm currents push bait toward offshore rigs, deep humps, and temperature breaks. These structures consistently gather feeding tuna, creating dependable opportunities for anglers targeting steady hookups throughout the season.
Southern California and Baja: Peak season runs from June to October, when the California Current carries warm water and abundant sardines offshore. Yellowfin follow these bait movements toward banks and ridges, giving anglers reliable opportunities for surface strikes, trolling action, and foamers during stable summer conditions.
Outer Banks & Mid-Atlantic: Yellowfin are most consistent from July to October, as warm currents and abundant summer bait gather along canyon edges and steep drop-offs. Temperature breaks strengthen feeding activity, creating predictable lanes where tuna travel, feed aggressively, and hold in schools along structured offshore contours.
International Hotspots
Costa Rica: Prime Yellowfin fishing occurs from April to November, when steady tropical currents gather bait near offshore seamounts and deep ridges. Warm, stable water temperatures keep tuna active, offering consistent opportunities for trolling, jigging, and live-bait presentations throughout much of the year.
Panama: Peak Yellowfin activity spans March to August, driven by powerful current collisions around deep seamounts and offshore pinnacles. These structures trap baitfish and create high-energy feeding zones, producing reliable opportunities for targeting large, fast-moving tuna during the season’s strongest conditions.
Seychelles: Yellowfin Tuna peak October to April, supported by warm tropical water and nutrient-rich currents. Offshore banks and ridges hold dense bait schools, drawing tuna into predictable zones where they feed aggressively and stay active across long stretches of the season.
Canary Islands: Best months are May to September, when warm currents drifting from West Africa carry bait toward offshore ridges and deep channels. These movements attract steady Yellowfin activity, giving anglers consistent chances to intercept feeding schools in clear, stable summer conditions.
How Temperature and Currents Affect Hotspots
SST Breaks: Sea Surface Temperature breaks between 72 and 82°F attract Yellowfin because bait gathers along these sharp transitions. Tuna patrol these edges to feed efficiently, making SST lines highly reliable indicators of productive offshore zones throughout changing seasonal conditions.
Bait Migration Trails: Baitfish follow nutrient-rich currents that move plankton and smaller forage offshore. Yellowfin track these migration paths closely, targeting concentrated bait along current edges, upwellings, and warm-water fingers. Understanding these trails helps predict predictable feeding areas long before reaching open water.
Offshore Fishing Guide for Yellowfin Tuna
Catching Yellowfin Tuna offshore requires smart preparation, careful navigation, and strong technique. Successful anglers rely on organized planning, precise positioning, and a clear understanding of offshore conditions to consistently locate feeding tuna across changing water patterns.
1. Preparing Your Boat for a Successful Yellowfin Trip
A productive offshore trip begins with proper equipment, safety planning, and an organized deck. These elements reduce downtime and ensure your team stays ready for fast-moving Yellowfin action.
Essential Boat Checklist
Carry extra fuel reserves for long offshore runs safely.
Keep GPS and backup navigation systems fully updated.
Use a tuned fishfinder to mark bait schools accurately.
Maintain a strong-flow livewell for healthy live bait.
Install outriggers for smooth multi-rod trolling spreads.
Stock safety gear, including EPIRB, VHF, and flares.
2. Navigating Toward Productive Yellowfin Zones
Finding tuna requires understanding offshore structure and environmental data. Combining GPS routes with temperature charts and current maps increases your chances of locating consistent feeding activity.
Tool Type | What It Shows | Why It Helps | Best Use Case |
|---|---|---|---|
SST Maps | Temperature changes and warm corridors | Identify productive temperature breaks | Target 72–82°F water bands |
Chlorophyll Charts | Plankton density offshore | Follow the food chain building blocks | Locate bait-rich green/blue zones |
Current Charts | Direction, strength, and edges | Predict bait and tuna movement | Plan drifts across current lines |
Bathymetric Maps | Ridges, canyons, deep humps | Mark natural holding structures | Plan trolling paths across depth breaks |
3. Reading Offshore Signs That Reveal Tuna Activity
Yellowfin often show their presence through surface behavior and predator interactions. Reading these signs quickly reduces search time and helps position your boat correctly.
Key Indicators
Diving birds reveal tuna pushing bait upward aggressively.
Dolphins often travel with feeding schools of Yellowfin Tuna.
Bait balls signal predators feeding beneath the surface.
Foamers indicate surface explosions from active tuna.
Slicks suggest tuna crushing bait moments earlier.
4. Depth Patterns & Water Column Behavior
Yellowfin move through depths based on light, temperature, and prey. Understanding these patterns improves technique selection and presentation timing.
Morning: Tuna rise near bait and feed closer to the surface, typically holding between 30 and 80 feet. Trolling and casting are the most effective techniques during this window.
Midday: Tuna drop deeper into cooler water as light and temperatures increase, often holding between 150 and 400 feet. Jigging and chunking work best during this period.
Afternoon: Fish begin lifting toward structure edges and mid-depth zones, usually between 50 and 150 feet. Poppers and stickbaits become effective as tuna move up.
Low light: Tuna chase bait near the thermocline and remain active between 80 and 200 feet. Slow jigging and live bait presentations perform well in these conditions.
Sonar Interpretation Tips
Wide arches indicate larger tuna swimming steadily beneath you.
Dense clusters suggest baitfish with predators close by.
Sharp streaks usually show tuna chasing fast-moving bait.
5. Boat Positioning & Approach Rules
Proper boat positioning determines how naturally baits enter the strike zone. Controlled approaches reduce pressure on feeding tuna, prevent spooking surface activity, and increase overall hookup opportunities during fast or subtle offshore feeding conditions.
Best Approach Practices
Drift upcurrent so baits move naturally with water flow into active feeding zones.
Avoid driving directly through visible schools to prevent pushing fast-moving tuna deeper.
Reduce engine noise when birds hover tightly overhead near feeding activity.
Make slow, wide turns around surface action to avoid scattering deeper tuna.
6. Offshore Trolling Spread Setup
Trolling helps cover large offshore zones efficiently and locate active tuna schools. A well-balanced spread keeps lures swimming correctly, prevents tangles, and creates multiple strike opportunities across different depths and positions.
Trolling Spread Tips
Run a five-rod layout to cover surface and mid-depth zones effectively.
Adjust trolling speed between six and nine knots for lure stability.
Keep lures spaced wide to maintain clean wakes and minimize tangles.
Match lure colors with local baitfish for more consistent strike response.
7. Drift Fishing & Chunking for Yellowfin
Drifting fishing and chunking excel when tuna hold deeper or become selective. This method uses steady scent trails and natural presentations to pull Yellowfin upward and encourage confident, consistent strikes near the boat.
Chunking and Drifting Tips
Toss small uniform chunks to maintain a continuous scent trail, attracting tuna upward.
Match hooked chunks to free chunks for natural presentation and realistic drifting.
Use light fluorocarbon leaders for subtle, convincing bait action in clear water.
Keep drag loose initially to prevent spooking tuna during early runs.
8. Jigging, Casting & Popping: Active Yellowfin Techniques
Active techniques work best when tuna surface feed, hold tightly on sonar, or respond to fast-moving presentations. Each method targets different depths and behaviors to trigger strong, consistent strikes offshore.
Vertical Jigging: Drop jigs to marked depths and vary motion to create sharp changes that trigger reaction bites from deeper or mid-column Yellowfin.
Stickbait Casting: Cast just outside foamers and retrieve steadily to mimic fleeing bait, allowing tuna to strike cleanly without disrupting surface activity.
Topwater Poppers: Use loud, forceful pops near heavy surface action to imitate distressed prey and provoke explosive surface strikes from aggressive tuna.
9. Fight Management & Landing Tuna
Yellowfin require controlled pressure, steady technique, and coordinated teamwork from hookup to landing. Proper drag settings, pump rhythm, and boat-side management greatly increase success and reduce risks during the final moments of the fight.
Drag Setup: Set drag to roughly one-third of line strength to maintain steady pressure without risking sudden line breaks during long runs.
Pumping Technique: Use short, controlled pump-and-reel movements to gain line efficiently while maintaining constant tension on the fish.
Circle Patterns: Expect tight circles near the boat as the tuna tires; keep the rod angled to guide the fish upward smoothly.
Gaffing: Position the fish’s head upward and secure a clean gaff shot into the shoulder area for a safe, controlled landing.
10. Offshore Safety Essentials
Long offshore runs demand strict preparation and reliable emergency systems. Proper communication tools, backup power, and weather awareness help anglers manage unexpected conditions and maintain safety far from the shoreline.
EPIRB or Satellite Communicator: Provides emergency location signals and distress communication when standard networks fail during extended offshore travel.
VHF Radio System: Ensures dependable vessel-to-vessel and vessel-to-coast communication for weather updates, coordination, and safety alerts.
Extra Fuel and Batteries: Prevents power loss during long-distance runs and supports essential electronics throughout changing offshore conditions.
Weather and Forecasting Apps: Monitor shifting wind patterns, storms, and offshore fronts to avoid hazardous situations before and during the trip.
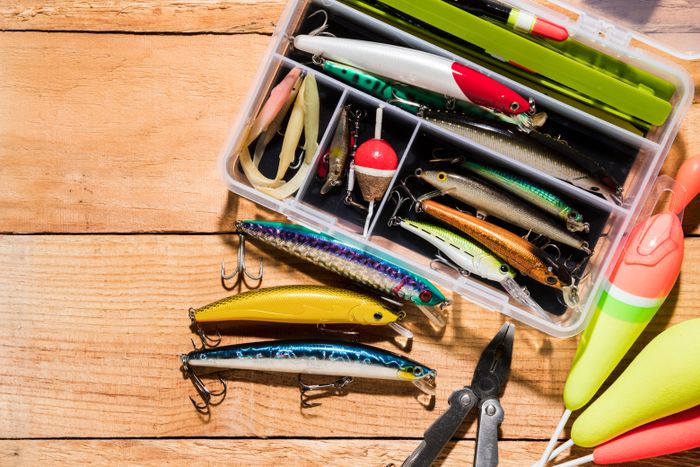
Bait & Lure Strategies for Yellowfin Tuna
Yellowfin respond differently to bait based on depth, water clarity, and feeding intensity. Matching forage, adjusting presentation, and selecting the right bait type significantly improve consistency across changing offshore conditions.
Live Bait Options
Sardines: Swim naturally on light tackle and attract fast strikes when tuna feed near the surface or chase bait close to temperature breaks.
Mackerel: Tough, strong-swimming bait ideal for deeper drifts, stronger currents, and situations where durable live presentations outperform smaller, softer baitfish.
Herring: Releases a strong scent trail and works well during low-light or mid-depth feeding periods when tuna rely more on scent than speed.
Artificial Lures
Skirted Ballyhoo Rigs: Produce natural swimming motion at different trolling speeds, helping imitate fleeing baitfish when tuna feed along structure or temperature lines.
Feather Jigs: Create fast, flashy movement that triggers aggressive reaction bites, especially effective when Yellowfin chase smaller forage near clean water edges.
Deep-Diving Plugs: Reach mid-depth zones with consistent wobble action, drawing strikes from pressured tuna reluctant to rise toward surface presentations.
Chunking Baits
Cut Sardine Chunks: Offer steady scent dispersal that pulls tuna upward, making them ideal for slower mid-day conditions when fish hold deeper and feed cautiously.
Skipjack Chunks: High oil content creates a strong trail during long drifts, helping attract larger tuna holding below active bait schools.
The Right Gear: Rods, Reels, Line & Tackle for Yellowfin Tuna
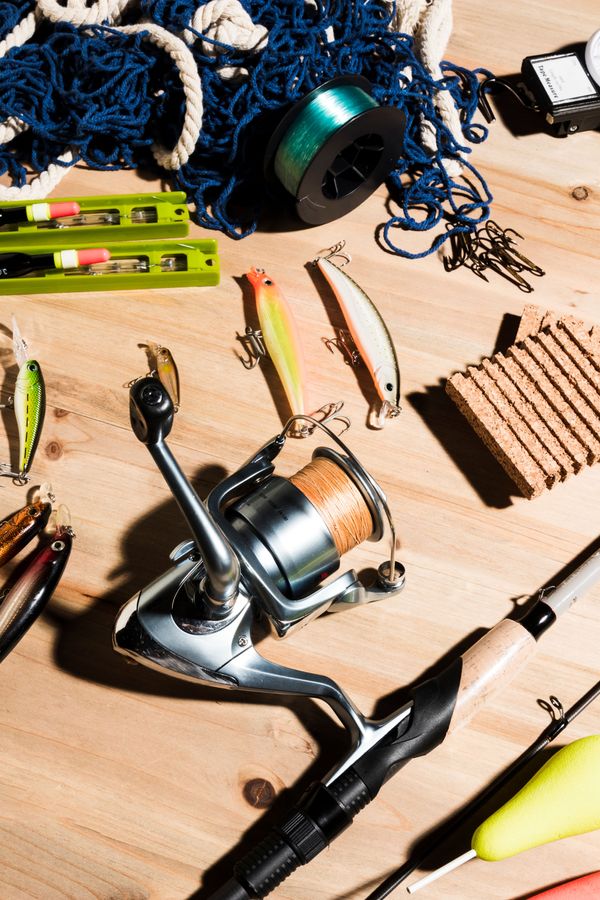
Choosing the right gear is essential for handling the speed, power, and endurance of Yellowfin Tuna. Strong rods, smooth drag systems, abrasion-resistant leaders, and reliable terminal tackle all work together to improve control, reduce failures, and help anglers land fish consistently offshore.
Here are the key gear components and why each one matters:
Rod: A medium-heavy or heavy offshore rod in the 30 to 80 lb class provides lifting power, controls long runs, and handles sudden pressure changes during hard fights.
Reel: A lever drag or two-speed reel with 20 to 35 lb of smooth drag maintains steady pressure during deep runs and gives better control throughout extended Yellowfin battles.
Main line: A 50 to 80 lb braided line offers zero stretch for better sensitivity, stronger hooksets, and improved handling during long-distance offshore runs.
Leader: A 40 to 100 lb fluorocarbon leader keeps visibility low for more bites while providing abrasion resistance against structure and tuna tail scuffing.
Topshot (optional): Adding 20 to 40 yards of monofilament provides shock absorption when trolling or fighting larger fish under higher drag settings.
Hooks: Heavy-gauge circle hooks in the 3/0 to 7/0 range create cleaner hookups, reduce deep hooking, and increase the chances of a safe release.
Terminal gear: Heavy-duty swivels, stainless crimps, and chafe gear eliminate weak points, strengthen connections, and protect knots during high-stress fights.
Proven Techniques to Catch Yellowfin Tuna
Catching Yellowfin Tuna consistently requires matching your fishing technique to depth, feeding behavior, and water conditions. Effective methods focus on covering water, presenting baits naturally, triggering reaction strikes, and adapting quickly when tuna shift between surface feeds, mid-column marks, or deeper holding layers influenced by temperature, current, or changing light.
1. Trolling for Tuna
Trolling helps cover wide offshore zones and locate active schools quickly. Running a balanced multi-rod spread allows lures to mimic fleeing baitfish across different depths. Varying speed, lure distance, and color patterns helps trigger strikes when tuna cruise temperature breaks or follow bait along current lines.
2. Jigging for Tuna
Jigging targets tuna holding deeper in the water column or marking tightly on sonar. Heavy vertical jigs reach depth quickly, and varied lifting rhythms trigger reaction bites. Jigging is especially effective during midday periods when tuna move deeper, become selective, or respond best to fast, erratic movements.
3. Casting to Foamers
Foamers occur when tuna aggressively push bait to the surface. Casting lures just outside the chaos prevents spooking fish while maximizing clean strikes. Stickbaits, metal lures, and poppers all work well, especially when matched to bait size and retrieved at speeds that mimic fleeing prey.
4. Live-Bait Drifting
Drifting live bait provides natural movement that appeals to selective tuna. Sardines, mackerel, and herring swim freely in the current, drawing strikes from fish feeding mid-depth or near temperature lines. Light fluorocarbon leaders and minimal resistance allow tuna to commit fully before setting pressure or increasing drag.
Key Offshore Conditions That Influence Yellowfin Behavior
Understanding offshore conditions is essential because Yellowfin Tuna react quickly to shifts in weather, pressure, and surface movement. Rising barometric pressure often brings tuna toward the upper water column, while falling pressure pushes them deeper and makes them more selective. Light wind adds surface texture that helps disguise boat noise, improving chances of clean strikes. Tuna also respond strongly to approaching fronts, tide changes, and cloud cover, which all influence how aggressively they feed and how widely they spread across open water.
Currents and water clarity determine where tuna gather and how they hunt. Strong current lines, upwellings, and temperature edges between 72–82°F collect baitfish and consistently hold Yellowfin. Clear blue water supports visual feeding, making natural presentations and fluorocarbon leaders important. In greener or mixed water, tuna rely more on scent and vibration, making chunking, scented baits, or louder lures more effective. Reading these conditions helps anglers choose the right method at the right moment.
How to Choose the Right Yellowfin Tuna Guide or Charter
Selecting the right guide increases success, improves safety, and pairs anglers with captains who understand tuna behavior and offshore conditions. To make an informed choice and plan confidently, here are the key factors to look for:
Experience with Yellowfin: Captains targeting Yellowfin regularly understand migration shifts, temperature breaks, and offshore structures, allowing them to position the boat effectively and adjust techniques for changing feeding patterns.
Offshore Capability: Choose charters built for long-range runs with reliable electronics, safety gear, strong hulls, and communication systems suited for deep-water travel under shifting offshore weather conditions.
Quality Gear Provided: Look for high-quality rods, two-speed reels, outriggers, and healthy livewells that support trolling, jigging, drifting, and casting methods for different Yellowfin sizes and behaviors.
Technique Specialization: Select crews experienced in trolling, jigging, casting, and drifting, ensuring they adapt daily based on tuna depth, water clarity, bait movement, and feeding intensity.
Safety Standards: Confirm EPIRB availability, updated VHF radios, first-aid readiness, weather tracking, and clear emergency procedures designed for long offshore distances and unpredictable open-water conditions.
Conclusion
Yellowfin Tuna challenge anglers with speed, power, and constantly changing offshore behavior, but success becomes much more consistent when you understand seasonal movement, read ocean conditions, and apply the right techniques. Strong preparation, dependable gear, and smart positioning help you adapt quickly when tuna rise, dive, or shift feeding intensity. Whether trolling along temperature breaks, casting into foamers, or drifting live bait through deeper zones, informed decisions always deliver better results. For anglers wanting expert support, updated insights, or help finding productive waters, Guidesly connects you with experienced captains who specialize in Yellowfin Tuna and offshore fishing success.
FAQs
1. What time of day is best for targeting Yellowfin Tuna?
Early transitions around sunrise and sunset often produce steady bites, as tuna shift feeding focus and move closer to surface layers influenced by changing daylight.
2. How fast do Yellowfin Tuna typically swim offshore?
Yellowfin can reach impressive speeds exceeding forty miles per hour, allowing them to chase agile prey quickly and travel efficiently across expansive offshore environments.
3. Do Yellowfin Tuna respond differently to noise compared to other tuna species?
Yes, Yellowfin often react noticeably to sudden noise changes, making quiet movement around active areas important when approaching feeding zones or adjusting boat positioning.
4. Can ocean color help identify areas holding Yellowfin Tuna?
Subtle variations in ocean color sometimes indicate nutrient presence or bait concentrations, making color shifts useful clues when searching broad offshore regions.
5. What water depth can Yellowfin Tuna be found in most frequently?
Yellowfin appear across wide depth ranges, often occupying mid-level layers where temperature stability, forage availability, and comfortable swimming conditions align throughout changing offshore situations.
6. How do birds behave when Yellowfin Tuna are actively feeding?
Bird formations typically tighten, circle persistently, or dive repeatedly when tuna push bait upward, offering helpful visual cues during long-distance offshore searches.
7. Do moon phases influence Yellowfin Tuna feeding patterns offshore?
Certain moon phases enhance nighttime illumination, encouraging extended feeding behavior and altering surface activity levels, especially during periods when forage movements shift noticeably.
8. How do temperature drops affect Yellowfin Tuna behavior?
Sudden temperature declines can push tuna into more comfortable layers, prompting slower movements and shorter feeding windows until conditions stabilize within preferred ranges.
9. Do Yellowfin Tuna travel in mixed-size schools or similar-size groups?
Schools sometimes contain mixed sizes, but comparable-size groups form frequently, helping tuna coordinate movement patterns and feeding efforts more efficiently across open-water environments.
10. Can ocean swell height influence Yellowfin activity offshore?
Larger swells may alter bait distribution and reduce surface visibility, occasionally causing Yellowfin to adjust feeding levels or shift positions within the water column.